Paper Pleating Tutorial
by Amy Rohl
Supplies

One 1 1/2" by 11" piece of cardstock for pleated layer
Scor-Pal™, or other scoring tool
Adhesive
Step-by-Step
Step 1
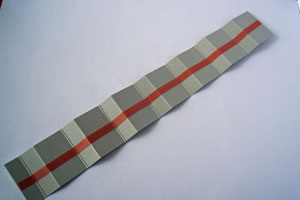
Score the cardstock strip first at the 1" mark, then at the 1 1/2" mark, then at 2 1/2", then at 3", etc. (alternating between adding 1/2" and 1" until you get to the end of the strip).
 Step 2
Add adhesive in the middle of the strip for the pleat to fan at both top and bottom. Variation: Add a line of adhesive along one edge of your scored strip if you prefer the pleat to fan out at the bottom
 Step 3
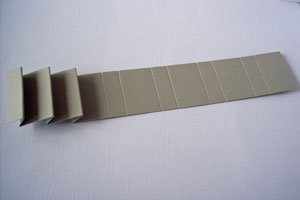
Accordion fold the strip. Starting with the left side, first make a mountain fold, then a valley fold, and so on, tucking each 1/2" section behind the 1" sections to form the pleats.
 Step 4
Attach pleated layer to cardstock. Optional: Secure further with baker’s twine or ribbon.
 Step 5
Finish your card.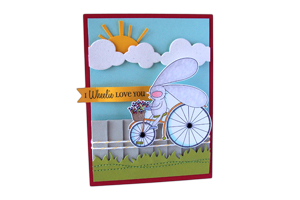
Go to www.thepapercrafthub.com to see what MFT Products are in store.
Here is the link to the original post.
http://www.splitcoaststampers.com/resources/tutorials/paperpleating/
We would love to see some of your pleated card projects.
No comments:
Post a Comment