Tuesday, June 28, 2011

Playing with Paint and Crackle medium

The MFT designers were challenged to incorporate paint in their MFT projects and this is what Judy Morrow came up with.


Instructions are below and if you are looking for more inspiration, go to Judy's blog http://confessionsofaribbonaddict.blogspot.com/2011/06/playing-with-paint-inspired-by.html
"First up, I stamped the bird's nest with Brilliance Graphite Black ink and clear embossed. Here is a little tip when you are embossing - heat the BOTTOM of your paper, NOT the top where the image is. This is especially helpful with fine lines or large areas and keeps your embossing powder smooth, and prevents it from melting in to the paper. That is what I did for this image.


Next, I used my paint dabber to "sponge" the edges of the card stock. I also used a flourish stamp from Own your Story to stamp some decorative detail in the corners of the panel. I used the paint for ink by dabbing it on the stamp and then stamping.

I used Smooch paint in a pearly white color to color in the eggs in the nest.


I used green Smooch paint to color the leaves.


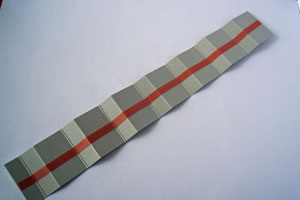
I whipped out another type of paint, Crackle Paint, to use on the background layer. I spread it generously on the paper and then set it aside for quite a while to dry.


Here is what it looks like after it dries.


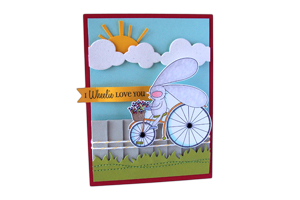
Here is the finished product one last time. Elegant with a touch of grunge! I finished it off with some gingham ribbon and a sentiment from the set stamped on one of the pieces from the First Place Award Ribbon Die-namics die.


While I had out all the materials, I decided to make one more paint card. After all, I needed something to do while my crackle paint was drying. LOL For this one, I decided to try a different type of technique and used a different Inspired By stamp set, Caged Bird. Again, I will show you the finished product first and then go in to the details below.

See the smooth finish of the embossed bird? That is achieved by heat embossing from the bottom of the paper instead of directly on the image.


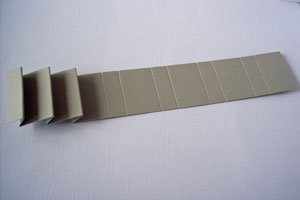
I just love the Mini Film Strip Die-namics die. I backed it with some patterned paper to make it stand out against the back layer patterned paper.

I used a sponge to swipe paint from my paint dabber, which I poured directly on the kraft card stock.


I sped up the drying process by using my heat gun and then stamped the diamond pattern over the paint using chalk ink.


I stamped the bird cage with Brilliance Graphite Black and then clear embossed, being sure to heat from the bottom of the card stock, instead of the top.


I distressed the edges of the card stock with my Tonic paper distresser, and added some twine to hang the bird cage from. I kept it pretty simple to keep the focus on the paint.


All done and how beautiful is this card by Judy?

MFT Projects to die for........

I am so lucky that I am able to promote My Favorite Things products by using the works of the ever so talented members of the MFT design team.

Enjoy!


Dies and stamps used in this card:

Flat bottom clouds die
Fly a kite die
Fresh cut grass die
Simply Scallops border die
Claire Keay - Enjoy every moment stamp set!


Dies and stamps used in this card:

Fishtail Banner
Upsy-Daisy Die
Four point frame incl. own your own story stamp set
a la modes - Somethings fishy stamp set


Dies and stamps used in this card:

Dizzy Doily Die
Upsy-Daisy leaves
Perfect Petal Trio
Say what, die and stamp set
a la modes - I treasure our friendship (clear set)


In this card:

Claire Keay - Little Lovosaurus stamp set

Thsi is a clear example of how you dress down a card and below
is the example of how you can bling it up.  I love both!


This card used:

Say what, die and stamp set
Claire Keay - Little Lovosaurus stamp set
Stacking stars die

Please go to www.thepapercrafthub.com.au to see what is in stock.

I do have a large order in trasnit so will have quite a lot more stock very very soon.
Ciao for now!

Tuesday, June 21, 2011

Rainbow Die-namics tutorial by Jody Morrow

With the Rainbow die on it's way, I searched for some tutorials that will make using this die easy.

This tutorial is by Jody Morrow, another talented My Favorite Things designer.


A Plethora if Rainbows

Let me tell you why I love the Rainbow Die-namics:
  1. It cuts a rainbow with an appropriate number of "stripes" - 7. Those of you who like accuracy will LOVE that! ROYGBIV (which I will explain below) can happen with this die. No choosing which colors to leave out.
  2. You can match your rainbow stripes to patterned paper. Just seven passes through the die-cutting machine with different colors and you can make SEVEN rainbows will all the pieces.
  3. If you want a smaller number of stripes, just remove some from the top or bottom to customize.
  4. The die was designed to work with BOTH sets of cloud dies, so take your pick between the Flat Bottom clouds or Cloud Trio and watch the magic happen.
  5. Rainbows are cute, happy, and can be used to make simple, scappy cards. No fuss, no mess, just CUTE!
Before I continue on (man this is getting wordy, sorry LOL), let me explain ROYGBIV for those of you who don't know. That is how I learned (and subsequently taught my children) the order of stripes on a rainbow.
  • Red
  • Orange
  • Yellow
  • Green
  • Blue
  • Indigo
  • Violet
Of course, the rainbow rule isn't set is stone for crafting, so feel free to make the rainbow of your choice... especially if it's pink. LOL

Let me show you my trio of simple, scrappy rainbow cards:

For the trio, I used the new Lime Twist My Mind's Eye 6 X 6 patterned paper pad. I kept em' sweet, simple, and scrappy.

For this card, I used the Cloud Trio Die-namics and Great Outdoors stamp set.


For this one, I used the Flat-Bottom Clouds Die-namics die. I also played on the rainbow theme by using matching colors of brads to line the bottom of the card.


I let the paper do the talking on this one and let the "happy accident" shine by adding just the rainbow and cloud to the adorable pattern on the paper. I decided to stitch two of the felt clouds together to add some pizazz. A double-stitched line added a little something without adding too much.


Here is a look at the Rainbow die:


Now, let me show you my trick for creating PERFECT Rainbows with ease. No lining things up, no craziness, just EASY!

Cut seven rainbows out using seven different colors of card stock (I chose colors that matched my patterned paper) and put your empty Rainbow Die-namics die in front of you to use as a "mold".


One color at a time, put your rainbow stripes in the die, as shown. Be sure to press them in there well and make sure they are inside the lines of the die. Put the "pretty" side of your card stock down.


I used a combination of red line tape and red line sticky dots, making sure to cover all the rainbow stripes. The goal here is to make sure the whole rainbow is connected well.


Slide out the rainbow (I used my paper piercer) and it will all be in one awesome piece. Here, you can see the finished rainbow with a TON of leftover pieces. The BEST part about it being all in one piece, is you can pop it up using dimensionals and not struggle with so many small pieces.


And here is my finished SEVEN rainbows, which can all be used with the My Mind's Eye Lime Twist 6 X 6 patterned paper pad. That's a lot of fun! :)


You can view this Tutorial and other projects at Jody's blog http://confessionsofaribbonaddict.blogspot.com/2011/06/plethora-of-rainbows.html

Paper pleating tutorial by Amy Rohl

I love this pleated card tutorial found on Split Coast Stampers.


Paper Pleating Tutorial

by Amy Rohl

Supplies

  • One 1 1/2" by 11" piece of cardstock for pleated layer

  • Scor-Pal™, or other scoring tool

  • Adhesive

Step-by-Step

    Step 1
    Score the cardstock strip first at the 1" mark, then at the 1 1/2" mark, then at 2 1/2", then at 3", etc. (alternating between adding 1/2" and 1" until you get to the end of the strip).
    Step 2
    Add adhesive in the middle of the strip for the pleat to fan at both top and bottom. Variation: Add a line of adhesive along one edge of your scored strip if you prefer the pleat to fan out at the bottom
    Step 3
    Accordion fold the strip. Starting with the left side, first make a mountain fold, then a valley fold, and so on, tucking each 1/2" section behind the 1" sections to form the pleats.
    Step 4
    Attach pleated layer to cardstock. Optional: Secure further with baker’s twine or ribbon.
    Step 5
    Finish your card. 

Card uses a Flopsey stamp set from 'My Favorite Things'.
Go to www.thepapercrafthub.com to see what MFT Products are in store.

Here is the link to the original post.
http://www.splitcoaststampers.com/resources/tutorials/paperpleating/

We would love to see some of your pleated card projects.

Monday, June 20, 2011

Playing with 'My Favorite Things' and Paint

'My Favorite Things' and Paint

With the huge rise in mixed media products and the gorgeous projects MFT have been running across online galleries, they thought it would be fun to combine My Favorite Things Stamps and Die-namics with all manner of "painty" products.

MFT challenged their designers to incorporate paint into their projects and here are their ideas for you!
Art Journalling is a huge trend and MFT designer Eva has put together an amazing  canvas combining MFT Stamps, Die-namics as well as Luminarte paints and moulding paste.

Eva has used Inspired by: Butterflies and Spring (stamp set), a text print from Own Your Story as well as the Typewriter Alphabet in this gorgeous creation!


Below are more mixed media projects created by the talented MFT designers. 


I hope you have been inspired to try something new!

Thursday, June 9, 2011

How to use the dies we are selling?

All Quickutz/Lifestyle Crafts, Sizzix and My Favorite Things dies work in most table top machines including the Sizzix Bigshot and Cuttlebug machines.

All Quickutz dies can be used with a Quickutz or Revolution cutting tool, a Sizzix Bigshot (with the multi purpose platform) or in the Cuttlebug (with "c" thin die adapter).

The diagram below shows how to stack when using thin dies such as Quickutz, Cuttlebug and My Favorite things dies.

Some dies like the Sizzix Bigz dies use a different configuration but refer to your standard platform for instructions. 

I will update this post as as needed and please let me know if you have any questions.

Welcome

Welcome to The Papercraft Hub - for the paper junkie.

Finally we have stock! 

Until thepapercrafthub.com.au is officially up and running, we will be using our blog to sell our products.

A catalogue will be available on my blog very soon.

So for now, please look around and hopefully you will find something to inspire you!

Ciao for now

Emilia

Emilia